With the New Year approaching we are all resolving to do things (lose weight, exercise more, get out of debt, etc). Hopefully many of you are planning to get more food storage. I have scanned some hand outs I gave that break down food storage into weekly or monthly goals. Look them over an decide which one meets your desire, budget and needs.
$5 a Week Food Storage
This one is a bit old, so it's probably more $5-$10 a week, but a good start point all the same. This is only food storage for 1 person for 1 year.
Weekly Food Storage Purchasing Plan
The prices per week will vary on this one, but if you want to start stocking up in a slow and steady pace this will keep you on track. The trick is you determine how much you need. When it says "peanut butter", you buy what you think your family will need for a year or you buy a few extra just to get the ball rolling.
There was a third handout I am still attempting to convert to virtual.
Sunday, December 19, 2010
Wednesday, December 15, 2010
Salt

Ye are the salt of the earth: but if the salt have lost his savour, wherewith shall it be salted?--Matthew 5:13
What does this scripture mean to you? How are you salt? And what does it mean to lose your "savour"? We each are called as members of the church to live His gospel, to share His gospel here on this earth. We are the flavor added to the mortal experience of others. And if we don't do this who else will. The same can be said for your food storage. The modern prophets have called us to fill our lives and shelves. If we don't do it for ourselves, no one else will. As we continue in this Christmas season it is important we remember Christ is the reason for all our actions. Even food storage is related to Christ. He called us to flavor the world with either that message or another of His loving messages. Either way we must add that spice to life, because no one else can live our mortality for us.
And for those who wondered you should get 6-8 lbs per person per year for your long-term food storage
Sunday, December 5, 2010
Wheat Grinders for Christmas
It seems that wheat grinders are received and given as Christmas presents. Probably because they are something most of us wouldn't usually buy ourselves. At least I've never bought myself a wheat grinder --it's always been a gift. I shared the following hand out with some basic info on the prices and differences between some wheat grinders for your reference.
Wheat Grinder Comparison
There is also a page after the comparison chart that give you some wheat basics.
Wheat Grinder Comparison
There is also a page after the comparison chart that give you some wheat basics.
Sunday, November 28, 2010
Give the Gift of Food Storage
Today I gave some suggestions on gifts to give yourself or others for Christmas that are food storage related. Below is the handout I intended to give everyone, but due to a broken copier at the church I have posted it here for you.
Give the Gift of Food Storage
Give the Gift of Food Storage
Thursday, November 11, 2010
Recipes from the Wheat Class
We held the Bread Making class today with Shanelle Rasmussen. Thank you Shanelle!!!
She showed us how to make a basic 100% whole wheat recipe that can be used for bread, pizza crust or cinnamon rolls. Below is her basic recipe and a link to the booklet of recipes we handed out.
She showed us how to make a basic 100% whole wheat recipe that can be used for bread, pizza crust or cinnamon rolls. Below is her basic recipe and a link to the booklet of recipes we handed out.
Shanelle’s Super-Terrific All-Wheat Bread Recipe
4 C warm water
1 TB salt
1/3 Cup oil
1/3 Cup honey
1 1/2 TB Dough Enhancer
1 1/2 TB Saf Yeast
7 Cups wheat kernels
3 4x8 pans
Freshly grind wheat into flour (medium setting). Add water and several cups of freshly ground whole wheat flour to mixing bowl. Mix using a few times quickly. Add the salt, honey, oil, dough enhancer and instant yeast and jog briefly. (If you are worried about your wheat try adding 3-4 TB gluten also). While mixer is slowly kneading at the lowest speed, slowly ad whole wheat flour until dough pulls away from the side of the mixing bowl. This will normally take all the flour you ground. But it is better to add to little than too much flour. Allow the mixer to knead the dough until the gluten is properly developed. this takes about 10-12 min. Turn oven on to pre-heat to 150. Shape into loaves and place in greased pans. Turn oven off. Put loaves in warm oven to rise until double in size. (This takes about 25 minutes). When loaves are double in size set oven to 350 and turn it on (leave loaves in the oven). Bake for 30-35 minutes.
To use as pizza crust just use it immediately without rising.
Shanelle’s Wheat Cinnamon Rolls
1 batch of Shanelle’s Super-Terrific All-Wheat Bread Recipe
½ c Brown sugar (more or less to taste)
1 T. Cinnamon ( more or less to taste)
1 grated apple, extra juice squeezed out in a paper towel
Cut dough into two equal parts. Working with half batch at a time, roll out to about ½ thick in a rectangular shape. Spread sugar and cinnamon evenly over dough and then spread grated apple on top. Roll dough inward from longest side. Once in a log shape slice into equal pieces (approximately 12). Repeat with the other half of the batch. Place on a greased baking sheet and cook for 18-24 minutes at 350 degrees.
Monday, November 1, 2010
Sprouts
Sprouts are a good way to get in vegetable storage. It takes up very little space and all you need is water and a sprouter to increase your nutrient level in seeds almost 10 fold. Sprouters are available at health food stores, Bosch kitchen Center, and The Good Earth. Seeds are also available where you get sprouter.
You can purchase a years supply of sproutable seeds from the Sprout Lady, Marjory Howes, in Fruit Heights by contacting her at 801.927.2225. It is wonderful because a full year's supply fits in one 5 gallon bucket and last 20 plus years.
Wednesday, September 29, 2010
Uses for Summer Tomatoes
With the tomato harvest coming we held a salsa making class. Below is the recipe for the freezer salsa. We were also given recipes for canned salsa but I haven't been able to track it down.
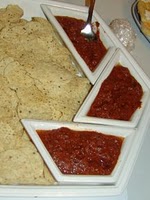
Roasted Tomato Salsa
2 lbs tomatoes, cut in half and seeded
3 T. olive oil
1 cup chopped onion
2 chipotle chilis in adobo sauce (or 2 jalapenos), chopped
2 cloves garlic crushed
2 t. chili powder
2 T. red-wine vinegar
(1.5 t. hot pepper sauce if you don’t use chipotles in adobo)
1 teaspoons salt (more/less to taste)
Tortilla chips for scooping
Place tomatoes cut side down on a broiler pan rack. Place in hot broiler until blackened, from 5-10 minutes. Remove from heat and coarsely chop.
Heat half of oil in a skillet and saute onions, garlic, jalapenos if you use, but not chipotles, until brown. Add chili powder and sauté a bit more.
Transfer the onion mixture and tomatoes to a blender with chipotle chilis and puree. Mix in remaining oil, vinegar, (hot sauce), and salt.
For the best flavor refrigerate a few hours before serving.
This can be frozen for up to 6 months. If it looses heat after freezing just add a few drops of hot sauce.
Tuesday, August 10, 2010
Step by Step Food Storage
Do you want someone to just tell you what to get and when and keep you going at a steady, but affordable pace and cover all the food storage and emergency preparedness. Well Food Storage Made Easy is the place. Sign up for their emails and they'll keep you on track with all the things you need for completing your food storage.
Get Thee to a Cannery
Our stake has cannery times at the Sandy Dry Pack every month, but you don't need to come at our reserved time. Just call the cannery to see if they have an available table and come whenever is good for you.
Sandy Home Storage Center
615 E 8400 S
Sandy, UT 84070
801-561-8104
In my effort to interest you in getting to the cannery I shared my Quick Cinnamon Bread Recipe recipe and food storage guidelines. But to get a more accurate calculation try the about.com website.
Sandy Home Storage Center
615 E 8400 S
Sandy, UT 84070
801-561-8104
In my effort to interest you in getting to the cannery I shared my Quick Cinnamon Bread Recipe recipe and food storage guidelines. But to get a more accurate calculation try the about.com website.
Quick Cinnamon Bread
1 c. wheat flour
1 c. white flour
¾ c. sugar
4 t. baking powder
2 t. cinnamon
½ t. salt
1 c. milk
3 T. vegetable oil
1 egg + 2 egg whites
1 T. vanilla
Streusel Topping (optional)
2 T. brown sugar
1 ½ t. cinnamon
2 t. soft butter
Mix all the ingredients together and beat on medium for 2 minutes.
Meanwhile, mix the streusel topping until crumbly (if using).
Pour batter into greased 8 x 4 loaf pan.
Sprinkle streusel on top and swirl lightly with toothpick.
Cook at 350 for 55-60 minutes.
Let cool on wire rack for 10 minutes then remove from pan.
Grains (wheat, rice, corn, rolled oats, spaghetti) | 400 pounds (181 kg) | 72 #10 cans (wheat) |
Legumes (dry beans, peas, lentils) | 60 pounds (27 kg) | 12 #10 cans (beans) |
Powdered Milk | 16 pounds (7 kg) | 4 #10 cans |
Sugar or Honey | 60 pounds (27 kg) | 10 #10 cans |
Cooking Oil | 10 quarts (9 liters) | |
Salt | 8 pounds (3.6 kg) | |
Water** (2 weeks) | 14 gallons (53 liters) |
Thursday, July 15, 2010
Water Storage
In the summer we all get dehydrated and we all become clearly aware how important water storage is, especially here in the heat of UT. Below are some basic answers to questions you might have about water storage.
I know that blue barrels go on sale at Macey's each year during their caselot sale. I believe that falls in March and October.
This water would be used in emergencies not just for drinking but also for some sanitation purposes (depending on how desperate things are)
How much? 1 gallon/person/day for 2 weeks = 112 water bottles/person
In what? Clean and sanitized food-grade containers or PETE plastic (the big blue barrels or soda bottles --not milk jugs)
How Long? Until expiration for commercially packed
Or refill every 6 months for other containers
Purification? Clarify then Boil, Bleach or Filter --tablets and filters are available at preparedness stores and camping stores.
I know that blue barrels go on sale at Macey's each year during their caselot sale. I believe that falls in March and October.
This water would be used in emergencies not just for drinking but also for some sanitation purposes (depending on how desperate things are)
Sunday, June 20, 2010
Strawberry Freezer Jam
This week we held the the Strawberry Freezer Jam class. Early summer is the perfect time to make this jam while strawberries are in season. But truth be told you can get strawberries year-round at wholesale stores (fancy way of saying Costco or Sam's Club) so it is a possibility whenever.
Below is the recipe I used and links to the Sure Jell and Ball websites for more jam recipes if you get really excited.
6. After set, you can keep in the fridge for a few weeks or in the freezer for a year.
Below is the recipe I used and links to the Sure Jell and Ball websites for more jam recipes if you get really excited.
Strawberry Freezer Jam
2 cups crushed berries (appox 2 pints or 1.5 lbs)
4 cups sugar
¾ cup water
1 pkg pectin MCP brand preferred or Sure Jell
1.Use a food processor to crush the berries or mash with a potato masher.
2.Measure out 2 cups berries. Mix in 4 cups of sugar and let sit for 10 minutes, stir occasionally.
3. Start this step after your berries have sat for 6 or 7 minutes. Bring the water and pectin to a boil over high heat. Boil 1 minute.
4. Pour pectin mixture over strawberry mixture and stir well. Keep stirring until sugar is dissolved up to 3 minutes. It is very important to get the sugar dissolved.
5. Pour into plastic containers and *let set for 24 hour*.
Wednesday, June 2, 2010
Get your veggies and fruit for LESS
I shared with everyone about the food co-op that you can order from.

You order a fruit/veggie basket from the website and then go pick it up at the given locations. Orders can be placed Monday and Tuesday and locations have pick up on Saturday (times vary by location). A basket consists of roughly half fruit and half vegetables and almost fills a rectangular laundry basket. The exact fruits and vegetables aren't promised before hand, but will follow the seasonal items and they try to keep it a mixture of items. There are also extra offerings sometimes like bread, special groupings of italian vegetables or salsa makings. The website will have more details on the order days for these types of things.
As this is a co-op you bring your own baskets/bags to haul your bounty home and they ask you give some volunteer time before to help sort the produce. But you save on the cost. Calculated you will get roughly 2 times the produce you would normally get for the money. And they do their best to use local producers so you can feel good you are helping your local farmer.
For more details and prices check the FAQ page for Bountiful Baskets.
Saturday, May 15, 2010
Cannery Apples
To encourage everyone to attend the Dry Pack I made apple crisp that I couldn’t serve because it was fast Sunday (Due to stake Conference). But a list of dry pack dates was handed out and everyone encouraged to go can something. Below is the recipe I made. (This was later served at the RS cooking class)
Apple Crisp
4 cups dehydrated apples
8 cups hot water
½ C. Sugar
½ C. Brown Sugar
1 tsp. cinnamon
In a large sauce pan combine water, apple slices, sugar and 1 tsp cinnamon and bring to a boil. Reduce heat and simmer for about 30 minutes. Drain off liquid reserving about 1 cup to Add back to the apple mixture.
Ingredients for Topping:
3/4 cup of old-fashioned oats
2/3 cup brown sugar, firmly packed
1/2 cup flour
1 teaspoon ground cinnamon
Dash of salt
1/2 cup of butter
1/2 cup of chopped walnuts (Optional)
Instructions:
Pre-heat oven to 400 degrees F Butter an 8 X 11 inch baking dish Place prepared apple mixture in baking dish. Mix old-fashioned oats, brown sugar, flour, cinnamon and salt in a large bowl Add butter and rub into mixture until coarse crumbs form Mix in walnuts Spread topping onto apple mixture Place in oven and bake until topping is golden brown .(about 35-40 minutes)
Saturday, May 1, 2010
Pinto Bean Fudge
Many have asked for this recipe since I handed out samples a long time ago.
1 cup cooked soft pinto beans (drained and mashed)
¼ cup milk
1 Tablespoon vanilla
6 oz unsweetened chocolate
6 Tablespoons butter or margarine
1 ¾ to 2 lbs powdered sugar
In large bowl stir beans and milk together, adding enough milk to resemble mashed potatoes; stir in vanilla. Melt chocolate and butter and stir into bean mixture. Gradually stir in powdered sugar until you reach a fudge consistency. Knead with hands to get it well blended, if you are not using a stand mixer. Spread lightly in a buttered 9 inch square pan or form into two 1 ½ inch rolls. Chill 1-2 hours. Then cut into pieces.
Subscribe to:
Posts (Atom)